
Ever taken a gold signal that looked perfect… then watched XAUUSD spike $12 against you, tap your stop, and immediately run to your take profit?
If you trade gold around $2,650 and you’ve felt that pain, you’re not alone.
The missing piece is often where price was likely to rebalance liquidity before moving, and that’s exactly what an XAUUSD fair value gap (FVG) helps you see.
In this guide, we’ll turn FVGs into a step-by-step signal confirmation checklist you can apply on M15–H4 to confirm (or reject) gold trade alerts with more consistency.
TL;DR: XAUUSD FVG Signal Confirmation in 60 Seconds
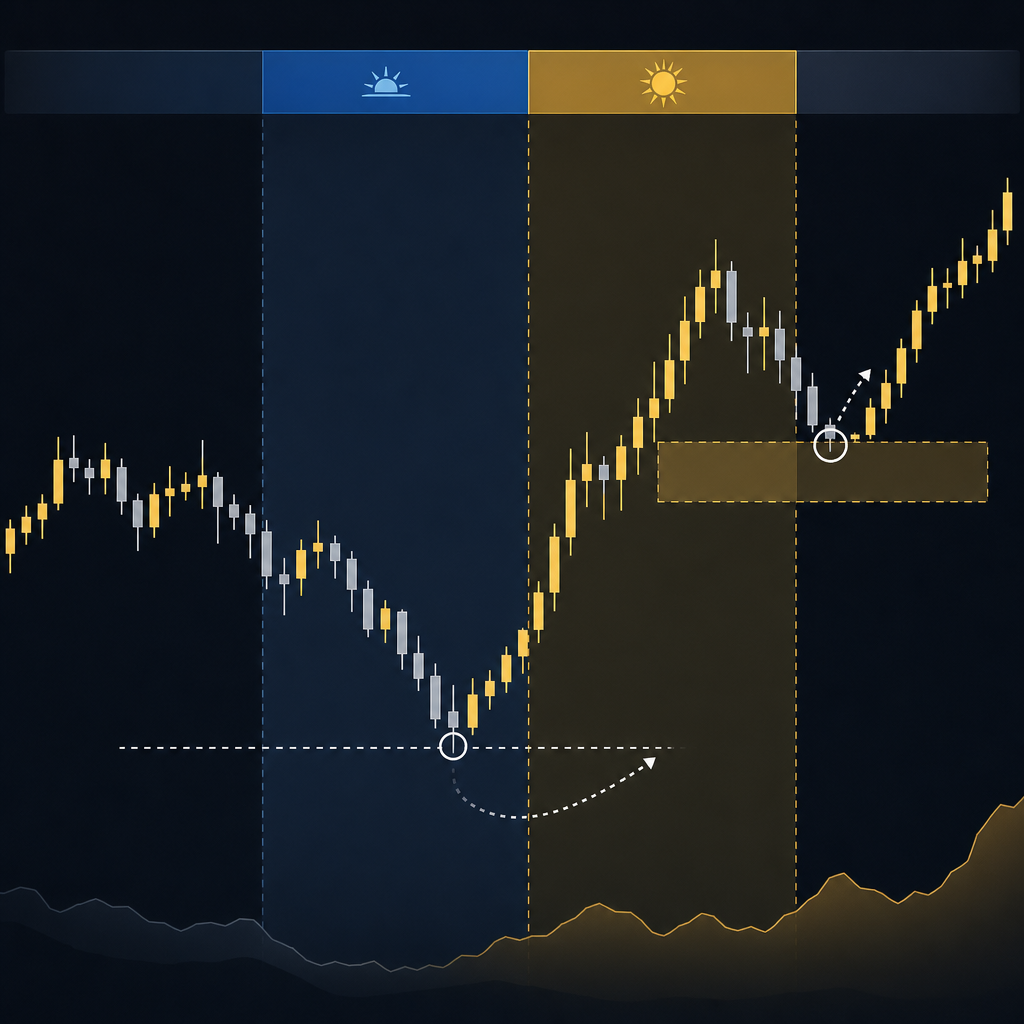
- Mark FVGs on H1–H4 first, then refine entries on M15; higher timeframe gaps matter more on gold.
- Only trade FVGs aligned with liquidity: look for a sweep of equal highs/lows or a session high/low before the retest.
- Use a clear trigger: rejection candle, displacement, or market structure shift (MSS) inside/after the gap.
- Invalidation is non-negotiable: if price closes through the FVG and holds, the idea is wrong—exit or skip.
- Stops on gold are usually $10–$25 from entry; targets should be 1:2 or 1:3 toward the next liquidity pool.
- Best execution windows are London and New York; avoid forcing FVG trades in dead hours.
Why Fair Value Gaps Matter on XAUUSD (and Why Gold “Hunts” Stops)

Gold is not EUR/USD.
At today’s context—XAUUSD around $2,650 (+0.35%), DXY near 106.80, and USD/JPY around 149.50—gold can move fast even when majors look calm.
That’s because XAUUSD is heavily driven by a mix of macro expectations, real yields, and risk flows.
When the market reprices those expectations, gold often prints impulsive displacement candles that leave behind inefficiencies.
An FVG is one of the cleanest ways to visualize that inefficiency.
In practical terms, an FVG is a “gap” in fair trading where price moved so quickly that it didn’t transact evenly.
Markets frequently revisit those zones to rebalance orders.
On XAUUSD, that revisit is also where many traders place stops and pending orders.
That’s why you’ll often see a classic sequence:
- Price sweeps a visible high/low (liquidity grab).
- Price snaps back into an FVG (rebalance).
- Price expands in the intended direction (delivery).
This is exactly why FVGs make such a powerful gold signal confirmation filter.
A signal without a logical rebalance area can still work, but it’s more likely to suffer from poor entry timing.
A signal aligned with an FVG retest after a liquidity sweep tends to be cleaner: tighter stop, clearer invalidation, and more predictable follow-through.
What an FVG is (simple definition)
In a three-candle sequence, a bullish FVG exists when the low of candle 1 is above the high of candle 3 (or in many trading definitions: when candle 2 displaces so hard that candle 1 and candle 3 don’t overlap).
A bearish FVG exists when the high of candle 1 is below the low of candle 3.
The key is imbalance created by displacement.
Why FVGs are especially useful for signal takers
When you receive a signal with entry/SL/TP, you still need to decide: do you execute now, wait, or skip?
FVGs give you a “map” that answers two questions:
- Where is the market likely to retrace before continuation?
- Where is the trade idea objectively invalid?
This turns signal execution from hope into a repeatable process.
FVG Basics for Gold: Bullish vs Bearish, Clean vs Messy, M15–H4
Before you build a checklist, you need consistent marking rules.
Most traders fail with FVGs because they mark too many, or they mark them on the wrong timeframe.
On XAUUSD, you want quality over quantity.
Bullish FVG on XAUUSD (what you’re looking for)
A bullish FVG is most actionable when it forms after a strong push up.
Think of a move from $2,632 to $2,658 in 30–60 minutes during London.
If that push leaves a clear imbalance, you mark the gap as a potential “buy zone” on pullback.
Your expectation is not that price must fill the entire gap.
Your expectation is that price may rebalance into it, then continue toward the next liquidity (like a prior high near $2,670–$2,680).
Bearish FVG on XAUUSD
A bearish FVG is most actionable after a sharp selloff.
Imagine a New York move from $2,676 down to $2,650, leaving behind a gap.
That gap becomes a potential “sell zone” if price retraces into it.
Again, you’re not forcing a full fill.
You’re looking for reaction and confirmation.
Clean vs messy FVGs (the quality filter most traders skip)
Clean FVGs stand out visually.
They are created by a displacement candle that is larger than recent candles and often breaks a local structure level.
Messy FVGs are small, overlapping, and form inside chop.
On gold, messy gaps get “respected” less because volatility and spread can chew them up.
As a rule of thumb:
- Clean FVG: created by a strong impulse that breaks a swing high/low or session range.
- Messy FVG: created inside a sideways range with no structure shift.
Which timeframe should you mark for gold signals?
For signal confirmation, the best workflow is top-down:
- H4: directional context and major imbalances.
- H1: tradable gaps that often act as magnets and reaction zones.
- M15: execution triggers and precise invalidation.
Most retail traders do the opposite and start on M5.
That usually creates “FVG overload” and random entries.
FVG vs Supply/Demand vs Order Blocks on XAUUSD (When to Use What)
Let’s be honest: gold traders are flooded with concepts.
Supply/demand zones, order blocks, breaker blocks, liquidity pools, imbalance, and more.
FVGs are not “better” than everything else.
They are simply one of the most practical tools for timing entries when volatility is high.
Here’s a comparison you can use when deciding what to prioritize for gold signal confirmation.
| Tool | What it represents | Best use on XAUUSD | Common mistake |
|---|---|---|---|
| Fair Value Gap (FVG) | Imbalance from displacement; inefficient trading | Timing pullbacks after liquidity sweeps; refining entries | Marking too many in chop; trading every touch with no trigger |
| Order Block (OB) | Last opposing candle before impulse | Higher timeframe decision zones; swing entries | Assuming every OB must hold; ignoring invalidation closes |
| Supply/Demand | Areas where price previously reversed strongly | Mapping big picture turning points (H4/D1) | Drawing zones too wide; entering without confirmation |
| Liquidity Pools | Clusters of stops above highs/below lows | Targets and “where the move wants to go” | Trading toward liquidity without considering news/session timing |
Our recommendation for most signal followers is simple.
Use liquidity as the “why,” and FVG as the “where.”
Then use a trigger candle or structure shift as the “when.”
A practical example at current prices
Suppose gold is trading $2,650 and you see equal lows around $2,642 from Asia.
London opens, sweeps $2,642 down to $2,638, then snaps back up to $2,652.
That snap creates a bullish FVG on M15 between roughly $2,640–$2,644.
Now you have a logical plan:
- Wait for price to revisit $2,640–$2,644.
- Look for rejection/MSS on M15.
- Target the liquidity above $2,660 and potentially $2,670.
This is how you turn a concept into execution.
Step 1: Build Your XAUUSD FVG Map (H4 → H1 → M15)
If you want FVGs to confirm signals, you need a consistent mapping process.
Otherwise, you’ll “find” an FVG that matches whatever you already want to do.
That’s confirmation bias, not confirmation.
1) Start on H4: identify the current dealing range
On H4, mark the last obvious swing high and swing low that price is reacting to.
In our current context, you might be looking at a dealing range like $2,610 to $2,690.
That range contains most of the meaningful liquidity and institutional activity.
Now look for the most recent H4 displacement candle.
If gold pushed from $2,630 to $2,660 quickly, there’s often an H4 or H1 imbalance left behind.
2) Drop to H1: mark the “tradable” FVGs
H1 is the sweet spot for most gold signal execution.
Mark only the clearest gaps created by strong impulses.
Limit yourself to 2–4 key zones.
If you mark 12 zones, you’ll hesitate at the moment you should act.
When you mark an H1 FVG, define:
- Top of the gap (premium boundary)
- Bottom of the gap (discount boundary)
- Midpoint (50%) as a “reaction line”
On gold, reactions often happen around the midpoint because it’s a common rebalance level.
3) Drop to M15: plan the trigger and invalidation
M15 is where you decide if the signal is executable.
Here’s the key mindset shift:
An FVG is not an entry by itself.
It’s a zone where you expect a reaction if the narrative (liquidity + session + structure) supports it.
On M15, you want one of these to happen inside/around the FVG:
- Rejection candle: long wick into the gap, close back out.
- MSS (market structure shift): break of a local swing after tapping the gap.
- Displacement confirmation: a strong candle away from the gap that breaks a minor level.
Step-by-step: marking an FVG correctly (quick checklist)
- Find the three-candle pattern where candle 2 is the displacement.
- Mark the gap between candle 1 and candle 3 (the non-overlap).
- Extend the zone to the right until price returns.
- Label it by timeframe (H1 FVG, M15 FVG) so you don’t confuse importance.
If you want to trade with signals but still be systematic, we recommend pairing this with a provider you can trust.
United Kings publishes premium entries with clear SL/TP on gold signals and broader setups on all signals, and you can use this FVG map to confirm whether to execute immediately or wait for a better fill.
Step 2: The XAUUSD FVG Signal Confirmation Checklist (Trade / Wait / Reject)
This is the core of the article.
When a gold signal arrives, your job is not to “believe” it.
Your job is to classify it: Trade now, Wait for retest, or Reject.
A. Context filters (before you look for an entry)
Run these first, every time.
- Where are we in the day? London and New York are prime; Asia can work but often ranges.
- Is DXY strong or weak? With DXY around 106.80, gold may be sensitive to USD swings.
- Are we near a known liquidity level? Prior day high/low, Asia high/low, equal highs/lows.
- Is price stretched? If gold already ran $25 without pullback, chasing is dangerous.
B. FVG alignment filters (the “where”)
Now check the FVG map.
- Is there an H1/H4 FVG in the direction of the signal? If yes, that’s your preferred entry zone.
- Is price currently inside an opposite FVG? If yes, be cautious—price may rebalance first.
- Is the FVG “clean”? If it’s messy, lower your confidence or require stronger confirmation.
C. Liquidity + sweep requirement (the “why”)
This is where most traders level up.
Gold loves to take stops before moving.
So we want evidence that stops were taken.
- Did price sweep equal highs/lows? Example: sweep $2,662 highs then reverse.
- Did price sweep the London session high/low? Very common before NY continuation.
- Did price run a prior day high/low? These are high-probability magnets.
No sweep doesn’t mean no trade.
But if there’s no sweep, you should demand a cleaner structure shift confirmation.
D. Entry trigger (the “when”)
Inside the FVG, wait for one of these triggers:
- Rejection + close: wick into the gap, close above (bullish) or below (bearish).
- MSS on M15: after tapping the gap, price breaks a minor swing in your direction.
- Two-step displacement: first candle taps, second candle displaces away and breaks a level.
E. Invalidation rules (the “when you’re wrong”)
Write this down and follow it.
- Bullish idea invalidation: M15 closes below the FVG and holds (or breaks the sweep low).
- Bearish idea invalidation: M15 closes above the FVG and holds (or breaks the sweep high).
On gold, “holds” can mean 1–2 candles depending on volatility.
When XAUUSD is whipping $5–$8 per candle, you need to be decisive.
Decision framework
- Trade: context + clean FVG + sweep + trigger.
- Wait: context + clean FVG, but no trigger yet (or price hasn’t reached the gap).
- Reject: no relevant FVG, opposite FVG in control, or invalidation already happened.
If you like structured execution like this, you’ll also benefit from our broader execution guides and community discussions in Telegram at United Kings official channel.
Step 3: Entry Models on Gold Using FVG + Liquidity Sweeps (3 Setups)
Now let’s make this concrete with three entry models you can repeat.
Each model works on M15–H1, and each is designed to confirm a signal instead of blindly taking it.
Model 1: Sweep → FVG tap → MSS (the “clean reversal”)
This is the classic.
Price takes liquidity, rebalances into the gap, then shifts structure.
Example (bullish):
- Asia prints equal lows at $2,642.
- London sweeps down to $2,638, then rallies to $2,652.
- M15 bullish FVG forms between $2,640–$2,644.
- Price retraces into $2,643, wicks, then breaks a minor swing at $2,650.
Execution idea: Buy on the break/close above $2,650 after the tap.
This avoids buying the first touch if volatility is still messy.
Model 2: Higher-timeframe FVG “magnet” + lower-timeframe trigger
Sometimes price is not reversing.
Sometimes it’s trending and simply pulling back to an H1/H4 imbalance.
Example (bullish continuation):
- H1 shows a bullish FVG from $2,628–$2,635 created during a strong rally.
- Price is currently $2,650 and begins to pull back in NY pre-market.
- Signal says “Buy zone $2,634–$2,636.”
If your H1 map already has that FVG, the signal is instantly more credible.
You then use M15 for a rejection candle or MSS to avoid catching a falling knife.
Model 3: Partial fill entry (scaling) inside the FVG
Gold often taps the midpoint and runs.
Waiting for a full fill can mean missing the move.
But entering too early can mean taking heat.
A practical compromise is scaling.
Example (bearish):
- Bearish FVG on M15 from $2,662–$2,666.
- Price retraces from $2,650 up into the gap.
- You place 50% size at $2,663 (midpoint area) and 50% at $2,665 (deeper fill).
Your stop is still defined, and your average entry improves if it fills deeper.
This model is best when spreads are stable and you’re trading during liquid sessions.
If you’re combining these models with professional alerts, our XAUUSD gold signals are designed around clear entry logic, and we regularly trade London and NY session flows where these patterns show up most.
Stop-Loss Placement on XAUUSD FVG Trades (Avoid the $3 Stop Trap)
Gold is famous for punishing tight stops.
A $3 stop on XAUUSD might work on a perfect scalping day, but it’s often just a donation to volatility.
For most M15–H1 FVG trades, realistic stops are typically $10–$25 depending on structure and session.
Three stop-loss methods that actually make sense
1) Stop beyond the liquidity sweep extreme
If your setup is based on a sweep, your invalidation is usually the sweep low (bullish) or sweep high (bearish).
Example (bullish):
- Sweep low: $2,638
- Entry after MSS: $2,650
- Stop: $2,636 (about $14 risk)
This gives room for a second tap without breaking the idea.
2) Stop beyond the FVG boundary + close rule
Sometimes the sweep extreme is too far.
In that case, you can use the FVG boundary with a strict close-based invalidation.
Example (bearish):
- Bearish FVG: $2,662–$2,666
- Entry: $2,664
- Stop: $2,676 (about $12 risk) if structure supports it
But you must define what “wrong” means.
If M15 closes above the gap and holds, you exit.
3) ATR-informed stop (volatility-adjusted)
When volatility expands, fixed stops get hit more often.
Using M15 ATR as a reference can help you avoid placing stops inside noise.
If M15 ATR is $6, a stop of $12–$18 (2–3x ATR) is often more realistic than $5.
The “$3 stop trap” story (realistic scenario)
A trader buys $2,648 because a signal says buy.
They set SL at $2,645 because it “looks tight.”
Gold dips to $2,644.80 during a spread/volatility push, stops them out, then rallies to $2,668.
Nothing was “rigged.”
The stop was simply inside a common rebalance zone—often an FVG or micro-liquidity pocket.
Position sizing reminder (so the stop can be logical)
If you want to use a $15 stop, you must size down.
That’s where many traders break risk rules.
We recommend reading our risk framework at risk management strategies when using signals and applying it to gold specifically.
Take-Profit Targeting with FVGs: 1:2 and 1:3 Using Liquidity Pools
Most traders choose take profit based on emotion.
They take $6 because it “feels good,” then watch price run $25.
Or they aim for $40 in a $12 range day and get nothing.
FVGs help you place entries.
Liquidity helps you place targets.
Step-by-step: choosing targets on XAUUSD
- Step 1: Identify the nearest liquidity pool in your direction (equal highs/lows, prior session high/low, prior day high/low).
- Step 2: Check if that target gives at least 1:2 RR versus your stop.
- Step 3: If 1:2 is too close, either skip the trade or reduce risk by waiting for deeper FVG entry.
- Step 4: Consider scaling out: TP1 at 1:2, TP2 at 1:3 or next liquidity.
Example 1: Bullish FVG trade with 1:3 RR
- Entry: $2,643 (tap into bullish FVG)
- Stop: $2,631 (risk $12)
- TP1 (1:2): $2,667 (reward $24)
- TP2 (1:3): $2,679 (reward $36)
Notice how targets align with likely liquidity: prior highs in the $2,670–$2,680 band.
Example 2: Bearish FVG trade with realistic NY target
- Entry: $2,664
- Stop: $2,676 (risk $12)
- TP1 (1:2): $2,640 (reward $24)
- TP2 (runner): $2,632 if prior day low sits there
On gold, those $20–$30 moves often happen when NY adds volume and a key level breaks.
How FVGs can also be targets
Sometimes the next magnet is an opposite FVG.
If price is bearish and there’s an unfilled bearish FVG below, that zone can attract price.
Just be careful: targets should be where others are forced to act (liquidity), not where you “hope” it goes.
Session Timing for XAUUSD FVG Trades (London & NY Playbook)
FVGs exist 24/5.
But the best FVG trades don’t.
Execution quality depends heavily on session timing.
Gold is most tradable when liquidity is deepest and spreads are tightest.
London session: the setup builder
London often creates the day’s first real displacement.
That displacement is what prints the cleanest M15/H1 FVGs.
Typical London behaviors on XAUUSD:
- Sweep Asia high/low within the first 60–120 minutes.
- Create an impulse and leave an FVG behind.
- Pull back into the FVG and continue toward a larger target.
If you’re getting a buy signal during London, your best confirmation is often: “Did London sweep and then create an imbalance?”
New York session: the delivery engine
New York often decides whether London’s move continues or reverses.
NY also reacts to US data and bond moves, which can spike gold quickly.
Common NY behaviors:
- Retest of a London-created FVG before continuation.
- Stop run above London high (or below London low) before reversing.
- Fast $15–$30 expansions when liquidity breaks.
Asia session: handle with care
Asia can be clean on some days, but it’s often range-bound.
That means many FVGs formed in Asia are “messy.”
If you trade Asia, you should demand stronger confirmation and smaller expectations.
Practical timing rule for signal followers
- If the signal arrives in dead hours, wait for London/NY to provide the sweep + trigger.
- If the signal arrives during London/NY and aligns with your H1 FVG map, you can often execute with more confidence.
United Kings focuses heavily on London and NY execution in our premium community, and you’ll see that reflected in how our trade signals are structured and managed.
Multi-Timeframe Workflow: Confirm Gold Signals with M15–H4 FVGs
Let’s turn everything into a repeatable workflow.
This is what you do every day, whether you’re trading one setup or ten.
1) H4: bias and “big magnets”
On H4, ask:
- Are we expanding upward or downward in the $2,610–$2,690 range?
- Where are the obvious swing points?
- Is there an H4 FVG above/below that price might seek?
If H4 is strongly bullish and price is pulling back, bullish FVGs are higher probability.
If H4 is strongly bearish, bullish M15 FVGs may just be short-lived retracements.
2) H1: the “signal validation layer”
When a signal says “Buy,” check if there’s an H1 bullish FVG below current price.
If yes, you have a logical retest zone.
If no, and price is already extended, you may be chasing.
At current levels, if gold is $2,650 and the nearest bullish H1 FVG is $2,620–$2,626, that’s far.
In that case, you either need a smaller M15 gap for entry or you skip.
3) M15: execution and confirmation
M15 provides the trigger.
Here you watch how price behaves as it enters the gap.
Gold often gives one of three reactions:
- Immediate rejection (best case).
- Deep fill then rejection (still fine if stop is placed correctly).
- Close through and hold (invalid).
4) Optional M5: only for precision, not for bias
If you drop to M5, do it only to refine entry after M15 confirms.
Many traders do M5 first, then invent a narrative.
Don’t.
How this helps you follow signals like a pro
Signals become a “trade idea.”
Your FVG workflow determines whether the idea is tradable now.
If you want a broader execution framework beyond FVGs, pair this with our resources like how Telegram signals work for beginners (the execution principles apply to gold too).
Common FVG Mistakes on XAUUSD (and How to Fix Them Fast)
FVGs are simple.
Trading them is not.
Here are the mistakes that cause most losses and frustration when confirming gold signals.
Mistake 1: Treating every FVG as “support/resistance”
An FVG is not guaranteed to hold.
It’s a zone of inefficiency, not a brick wall.
Fix: require a trigger (rejection, MSS, displacement) before entry.
Mistake 2: Marking FVGs inside chop
When gold is ranging $2,646–$2,654, you can find 20 micro-gaps.
They don’t mean much.
Fix: only mark gaps created by clear displacement that breaks a level or sweeps liquidity.
Mistake 3: Ignoring session context
An Asia FVG is not the same as a London impulse FVG.
Fix: prioritize London/NY created imbalances for signal confirmation.
Mistake 4: Stops placed inside the gap
If you buy inside a bullish FVG and place your stop $4 below entry, you’re often placing it inside the same rebalance zone.
Fix: place stop beyond the sweep extreme or beyond the FVG boundary with a close-based invalidation.
Mistake 5: Taking profit randomly
Gold can move $20 quickly.
If you take $6 because you’re scared, you’ll never let the edge play out.
Fix: target liquidity pools and enforce minimum 1:2 RR.
Mistake 6: Confirmation bias with signals
If you want to buy, you’ll “find” a bullish FVG.
Fix: map first (H4/H1), then evaluate the signal against your map.
For a broader checklist mindset when evaluating any provider’s alerts, you can also review our beginner-friendly checklist at signal provider checklist and adapt it to XAUUSD.
Realistic Trade Walkthroughs at $2,650 (2 Examples with SL/TP)
Let’s put everything together with two realistic scenarios using the current market context.
These are examples for education, not trade recommendations.
Walkthrough 1: Bullish continuation from an H1 FVG (London → NY)
Context: Gold is trading around $2,650, mildly bullish on the day (+0.35%).
DXY is firm at 106.80, so gold is not in “free run” mode.
That means we prefer confirmed entries, not chasing.
H1 map: A bullish displacement earlier left an H1 FVG from $2,636–$2,642.
Above, there’s liquidity at the prior high near $2,668.
Signal arrives: “BUY XAUUSD 2640–2642, SL 2628, TP 2666 / 2678.”
We confirm:
- Entry aligns with the H1 FVG zone.
- Stops are below the gap and likely below a sweep low (good).
- TP aligns with liquidity above (good).
Execution (M15):
- Price dips into $2,641, wicks to $2,639.50, then closes back above $2,642.
- M15 breaks a minor swing at $2,648 (MSS confirmation).
Trade plan:
- Entry: $2,648 after MSS (conservative) or $2,641 (aggressive touch).
- Stop: $2,636 (risk $12 if entry $2,648; smaller risk if entry $2,641).
- TP1: $2,672 (about 1:2).
- TP2: $2,684 (about 1:3).
Management: When TP1 hits, you can move stop to breakeven or reduce risk, but avoid tightening too early.
Gold often retests once before expanding again.
Walkthrough 2: Bearish reversal after a NY sweep into a bearish FVG
Context: Price has rallied into $2,670 during NY.
Retail sees breakout and buys late.
We look for the stop run.
Liquidity: Equal highs from yesterday sit at $2,672.
Price spikes to $2,676, then dumps to $2,662.
That dump prints a bearish FVG on M15 from $2,668–$2,672.
Signal arrives: “SELL XAUUSD 2670, SL 2684, TP 2642.”
We confirm:
- Entry matches bearish FVG zone.
- Stop above the sweep high is logical.
- TP targets a lower liquidity pool near $2,642.
Execution:
- Price retraces into $2,670, wicks to $2,671.80, closes back below $2,668.
- Next candle displaces lower, breaking $2,662.
Trade plan:
- Entry: $2,668–$2,670
- Stop: $2,684 (risk $14–$16 depending entry)
- TP1 (1:2): $2,638–$2,640
- TP2 (1:3): $2,624–$2,626 if the day expands
The point isn’t the exact numbers.
The point is that the FVG gave you a structured sell zone after the sweep, instead of selling randomly in the middle.
How United Kings Traders Use FVGs to Execute Gold Signals Cleaner
Signals are powerful when they’re clear.
But execution is what determines your results.
At United Kings, the goal is to make execution simpler, not more complicated.
FVGs help because they reduce decisions to a few repeatable questions.
Our practical “signal + FVG” approach
- We focus on London and NY session trades because that’s where gold delivers the cleanest displacement and follow-through.
- We provide clear Entry, SL, and TP levels so you’re not guessing where the trade is wrong.
- Traders use FVGs as a filter: if the entry is in/near a clean FVG that matches the day’s liquidity narrative, confidence is higher.
- Education is included so you understand why the setup exists, not just what to copy.
What “confirmation” looks like in real life
Imagine you receive a buy signal at $2,642 with SL $2,630 and TP $2,666.
Instead of entering instantly, you check:
- Is $2,642 inside an H1 bullish FVG? If yes, great.
- Did London sweep a low before pushing up? If yes, even better.
- Is there an M15 rejection candle? If yes, execute.
If one of those is missing, you don’t panic.
You either wait for the trigger or skip the trade.
That one habit alone can reduce the number of “good idea, bad entry” losses.
Community edge (why it matters)
Gold moves fast.
Having a live community to compare notes on session highs/lows, sweeps, and key FVG zones is a real advantage.
United Kings has a 300K+ active trader community where traders share charts, execution notes, and management ideas.
If you trade more than gold, we also cover majors like EUR/USD (around 1.0520), GBP/USD (around 1.2680), and USD/JPY (around 149.50) through forex signals—but for this guide, the focus is using FVGs to sharpen XAUUSD execution.
FAQ: XAUUSD Fair Value Gap (FVG) Trading Strategy
1) What timeframe is best for XAUUSD fair value gaps?
For most traders, mark FVGs on H1 and H4 for the most meaningful zones, then use M15 for entries and confirmation.
M5 can help refine entries, but it’s not ideal for defining bias.
2) Do FVGs always get filled on gold?
No.
Gold often reacts at the midpoint or partial fill and continues.
That’s why you need triggers (rejection/MSS) and why scaling entries can help.
3) How far should my stop loss be on an XAUUSD FVG trade?
Typical stops for M15–H1 FVG trades are often $10–$25, depending on volatility and where the sweep extreme is.
Avoid placing stops inside the gap where noise can tag you.
4) What’s the best target method for FVG trades?
Use liquidity pools as targets: equal highs/lows, prior day high/low, and session highs/lows.
Then enforce a minimum 1:2 risk-reward, with optional runners toward 1:3.
5) Can I use FVGs to confirm Telegram gold signals?
Yes.
FVGs are ideal as a confirmation tool because they tell you whether the entry zone is “where price is likely to rebalance.”
If the signal entry aligns with an H1/H4 FVG and you get an M15 trigger during London/NY, execution quality typically improves.
Risk Disclaimer (Read Before You Trade)
Forex and gold trading involves significant risk and may not be suitable for all investors. You can lose some or all of your capital. Past performance is not indicative of future results. Signals and educational content are provided for informational purposes only and do not constitute financial advice. If you’re new, practice on a demo account first, use strict risk management, and never risk money you can’t afford to lose.
Join United Kings: Premium Gold Signals + Clear Execution Levels
If you want to combine a professional gold signal confirmation process with high-quality trade ideas, join the United Kings community.
We deliver premium Telegram signals for forex and gold with clear Entry, SL, and TP levels, plus educational guidance to help you execute with discipline.
- 85%+ win rate (historical performance; not guaranteed)
- 300K+ active traders in the community
- London & NY session focus for cleaner volatility
- 48-hour money-back guarantee for peace of mind
Explore our full offering on United Kings signals and our dedicated XAUUSD gold signals.
Choose a plan on our pricing page: Starter (3 Months $299), Best Value (1 Year $599 with 50% savings + FREE ebook), or Unlimited (Lifetime $999).
And if you want the fastest access, join our Telegram now: United Kings Telegram trading signals.
Your edge isn’t finding more trades. It’s executing fewer trades with clearer confirmation—and FVGs are one of the simplest ways to do that on XAUUSD.


